
In today’s data-driven world, understanding how users interact with your website is crucial for optimizing campaigns and maximizing ROI. Conversion tracking is the cornerstone of this understanding, providing invaluable insights into which actions users are taking on your site, from filling out forms to completing purchases. This article, “How to Track Conversions with Google Tag Manager,” offers a comprehensive guide to implementing robust conversion tracking using this powerful, free tool. Learn how to efficiently leverage Google Tag Manager to monitor and analyze your key website conversions and unlock the potential for data-driven decision making.
Google Tag Manager (GTM) simplifies the process of adding and managing tags on your website, eliminating the need for extensive code modifications. This streamlined approach allows marketers and website owners to efficiently track various conversions, including form submissions, button clicks, file downloads, and more. By following the steps outlined in this tutorial, you will gain a clear understanding of how to configure Google Tag Manager to capture essential conversion data, empowering you to refine your strategies and achieve your business objectives. Whether you’re a seasoned marketer or just beginning your journey with conversion tracking, this guide provides the knowledge you need to effectively utilize Google Tag Manager.
Introduction to Google Tag Manager
Google Tag Manager (GTM) is a tag management system that allows you to quickly and easily update measurement codes and related code fragments collectively known as tags on your website or mobile app. This includes tags from Google products like Google Ads and Google Analytics, as well as tags from third-party vendors.
Instead of manually editing site code, GTM uses a web-based interface where you can manage and deploy tags through a user-friendly interface. This significantly simplifies the process of adding and modifying tracking codes, saving you time and resources.
GTM uses triggers to define when and how tags should fire. For instance, you can configure a trigger to fire a tag when a user clicks a specific button, views a particular page, or completes a form. This level of control gives you granular control over data collection.
By implementing GTM, you gain the flexibility to manage various marketing and analytics tags without directly involving developers, thereby streamlining the tracking process and reducing the risk of errors.
Installing GTM on Your Site
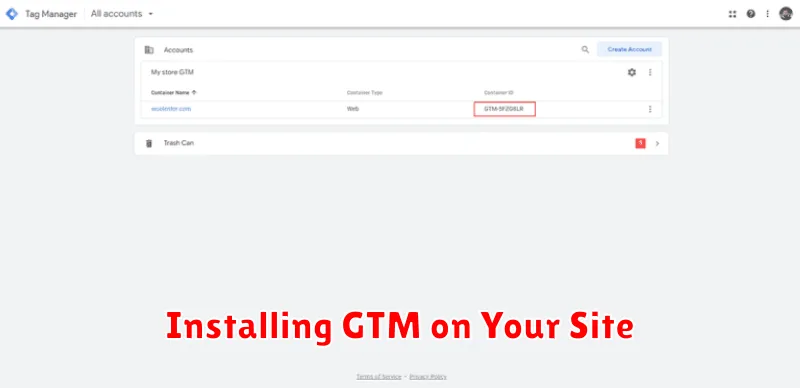
Before you can start tracking conversions, you need to install Google Tag Manager (GTM) on your website. This involves adding two code snippets provided by GTM to every page of your site. This process may vary slightly depending on your website platform (e.g., WordPress, Shopify, custom-built).
First, copy the GTM container snippet. This code should be placed immediately after the opening <head> tag in your website’s HTML.
Second, copy the <noscript> tag snippet. This code should be placed immediately after the opening <body> tag. The <noscript> tag ensures that GTM still functions, albeit in a limited capacity, if a visitor has JavaScript disabled in their browser. Although less common, this provides a fallback mechanism for data collection.
After installing these snippets, you can verify installation within your GTM account. This typically involves checking for a successful connection and previewing your website to confirm that GTM is active.
Creating Tags for Conversion Events
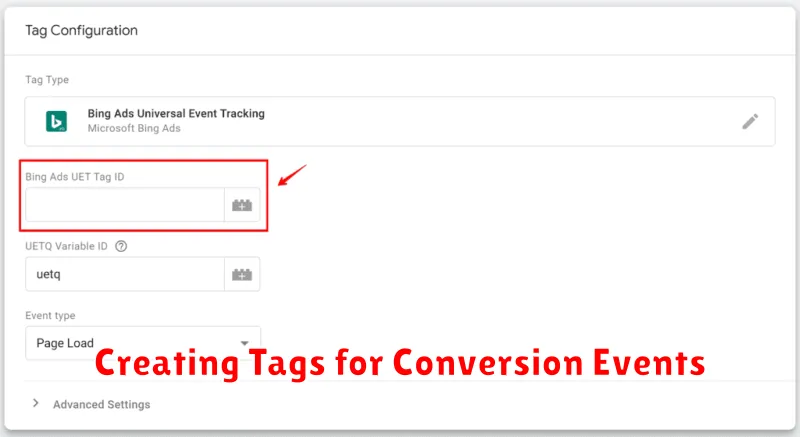
After configuring your triggers, the next crucial step is creating tags in Google Tag Manager to track your defined conversion events. These tags send data to your chosen analytics platform, allowing you to measure the effectiveness of your marketing campaigns.
The tag setup process generally involves selecting the appropriate tag type, which varies depending on the platform you are using (e.g., Google Analytics 4, Google Ads, etc.). Tag type is a critical component as it dictates the format of the data being sent. For instance, with Google Analytics 4, you might select “GA4 Event” as the tag type.
Within the tag configuration, you’ll need to link the tag to the corresponding trigger you created earlier. This ensures that the tag fires only when the specified conversion event occurs. Furthermore, you need to specify the event parameters, which provide additional context about the conversion. These parameters might include details like the conversion value, product ID, or any custom dimension relevant to your business.
Setting Up Triggers
Triggers define when your tags should fire. They are crucial for accurate conversion tracking. A trigger listens for specific events on your website, like a button click or a form submission, and then activates the associated tag.
Trigger Configuration involves selecting a trigger type and defining the necessary conditions. Common trigger types include:
- Page Views: Fires when a user loads a specific page or set of pages.
- Clicks: Fires when a user clicks on certain elements, such as buttons or links. You’ll often utilize “Just Links” or “All Elements” click triggers.
- Form Submissions: Fires when a user submits a form.
When setting up click triggers, filters are important. These filters ensure your tag only fires when specific criteria are met, such as when the clicked element contains certain text or has a specific CSS class.
Testing your triggers is vital. Use the “Preview and Debug” mode in Google Tag Manager to verify that triggers fire as expected.
Verifying with Tag Assistant
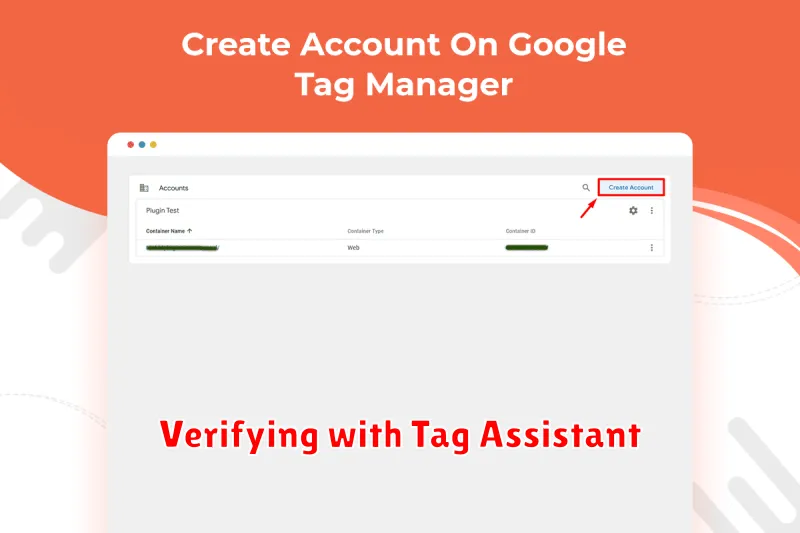
After configuring your Google Tag Manager container and setting up conversion tracking, it’s crucial to verify that everything is working correctly. A valuable tool for this is Tag Assistant. This free Chrome extension helps you troubleshoot and validate your implementation.
Install Tag Assistant from the Chrome Web Store. Once installed, enable the extension and navigate to the page where your conversion tracking should be active. Tag Assistant will analyze the page and display the tags that fired, including your Google Tag Manager container and associated tags.
Look for your Google Tag Manager container tag. A green indicator suggests it’s working properly. Expand the container to see the individual tags within it. You should see your conversion tracking tag firing when the desired action is completed (e.g., a form submission or purchase). Verify that the tag is firing with the correct parameters and values.
Troubleshooting Tip: If your tags aren’t firing as expected, Tag Assistant can help identify potential issues. Look for yellow or red indicators, which signify warnings or errors. The details provided by Tag Assistant can guide you towards a solution.
Linking GTM with Analytics and Ads
After setting up Google Tag Manager (GTM) and implementing tags, the crucial next step is linking it with your Google Analytics and Google Ads accounts. This integration enables comprehensive conversion tracking and unlocks valuable insights into user behavior.
Connecting GTM with Google Analytics allows you to send data collected by your tags directly to your Analytics property. This enables in-depth analysis of website traffic and conversions, helping you understand how users interact with your site and which marketing efforts are most effective.
Similarly, linking GTM with Google Ads facilitates accurate conversion tracking for your ad campaigns. By importing conversions from GTM into Google Ads, you can measure the return on investment (ROI) of your advertising spend and optimize campaigns for better performance.
The linking process involves adding your Google Analytics and Google Ads account IDs within the GTM interface. Accurate configuration is essential for proper data flow and reporting. This integration empowers you to make data-driven decisions and refine your marketing strategies.